In this step, we will start using the database, to populate the list of breeds from the breeds table.
Files to create / update
create breeds.php /site/controllers/breeds.php
update breeds.php /site/models/breeds.php
update view.html.php /site/views/breeds/view.html.php
update default.php /site/views/breeds/tmpl/default.php
update breed.xml /breed.xml
update en-GB.com_breed.ini /languages/site/en-GB/en-GB.com_breed.ini
File Details
/site/models/breeds.php
protected function getListQuery()
	{
		// Create a new query object.
		$db    = $this->getDbo();
		$query = $db->getQuery(true);

		// Select the required fields from the table.
		$query
			->select(
				$this->getState(
					'list.select', 'DISTINCT a.*'
				)
			);

		$query->from('`#__breed_breed` AS a');

		return $query;
	}
Normally, the model is used to perform database operations like storing and retrieving data. In this part of the tutorial, I will show you how data can be fetched from the database using a model. As described in the previous step, we have a model class here, BreedModelBreeds, extending JModellList, which is meant for pulling records from a database.
After declaring the model class, we are overwriting the default getListQuery() function provided by the class to which we are extending. This getListQuery() function will return a query string back to JModelList, which will execute it against a selected database table and, on the basis of that query, fetch the results, which it will pass on to the view to be displayed in a tabulated form. Now on line 26 of the above-mentioned code, we are pulling a database object through $this->getDbo(), which is a database connector method. So whenever you have to do anything with databases, either inserting, deleting, or updating a record, or want to change or add any field to a table, or have to perform any sort of database-specific operation, you have to call this method first. It will allow you to create and run queries, as well as display results in a variety of formats.It will also display any database- and query-specific bugs and errors.
Following the call to the database object, we will initialise the query object into the $query object.You might have worked on PHP database-based applications and built queries in SQL. The same thing happens in Joomla as well, but at an advanced level to make the querying process more flexible, organized, and, in the event of an error, easy to troubleshoot. For creating a query, first we call the getQuery method through the $db object and then pass it to the $query object by giving “true” in the argument section to return a new database query object. Passing “true” in the argument list refreshes the getQuery() function and is necessary because without it, the call to getQuery() returns the last executed query that the database connection has stored.
You can take getListQuery(), simply a method to prepare a query against the database. To handle the data automatically, there are other methods in JModelList class and getItems is a good example of it, used to retrieve a list of items or records from the database.
create breeds.php /site/controllers/breeds.php
<?php

defined('_JEXEC') or die;

require_once JPATH_COMPONENT . '/controller.php';

class BreedControllerBreeds extends BreedController
{
	public function &getModel($name = 'Breeds', $prefix = 'BreedModel', $config = array())
	{
		$model = parent::getModel($name, $prefix, array('ignore_request' => true));

		return $model;
	}
}
We have already gone through the front or base controller in the previous steps. In this part, I am introducing you to a second type of controller, called the sub-controller or application controller. While we can put all of our task-related code in the base controller and still build a fully functional application, it is still a good idea to create separate views corresponding to each separate view and model so that code can be easily and perfectly organized. Developing, deploying, and troubleshooting will become easier with this method. Sub-controllers are normally put in a “controllers” folder, located at the root of the component, both on the front and back ends.
So we have created a controller file, breed.php, in the controllers folder of our component frontend root, as shown above. You’ve probably heard of defined(“_JEXEC”) or die; on lines 4 and 6, we’re calling our main controller, which contains the base controller library.After that, on line 13, we have created a class named BreedControllerBreeds, in which the first portion, “Breed,” is the name of a component, “Controller,” indicates that this is a controller class, and “Breeds,” is the name of a file, and it is extending the BreedController class.
Lines 18 to 23 show our basic purpose of creating the controller file, as we are calling our model here, that we have created above. In the BreedControllerBreeds, we are getting the model we have created above, and then it will be passed on to the View. We are calling this the Breeds model here because this is the model that contains support for saving, changing state, ordering, etc.
This is significant because, unlike other MVC frameworks, Joomla views can obtain data directly from models.But it is always a best practise that you should use a controller to fetch the model to avoid messing things up, especially when you are working on a large project. Joomla also supports multiple controllers per single component.
/site/views/breeds/view.html.php
protected $items;

	public function display($tpl = null)
	{
		$app = JFactory::getApplication();

	        $this->items = $this->get('Items');

		// Check for errors.
		if (count($errors = $this->get('Errors')))
		{
			throw new Exception(implode("\n", $errors));
		}

		parent::display($tpl);
	}
This file is responsible for getting model data. In this view.html.php, as compared to the previous step file, you can clearly see that we have added a protected property called “items” and another line of code, $this->items = $this->get(‘Items’); It is a get method, specifically for JView, and it has nothing to do with the actual get method belonging to the model, which we discussed in the previous step. It ensures that we are not directly accessing the method residing in the model. JView loads the model and view in the same view.html.php file.
/site/views/breeds/tmpl/default.php
<?php

// No direct access
defined('_JEXEC') or die;
?>

<h1><?php echo JText::_('COM_BREED_TITLE_BREEDS'); ?></h1>

		<table class="table table-striped" id="breedList">
		<thead>
		<tr>

		<?php if (isset($this->items[0]->id)): ?>
				<th width="1%" class="nowrap center hidden-phone">
					<?php echo JText::_('ID'); ?>
				</th>
			<?php endif; ?>

				<th class=''>
				<?php echo JText::_('COM_BREED_BREEDS_BREEDNAME'); ?>
				</th>
				<th class=''>
				<?php echo JText::_('COM_BREED_BREEDS_PIC'); ?>
				</th>
				<th class=''>
				<?php echo JText::_('COM_BREED_BREEDS_BREEDCAT'); ?>
				</th>

		</tr>
		</thead>
		<tbody>

			<?php foreach ($this->items as $i => $item) : ?>

        <tr>

	<?php if (isset($this->items[0]->id)): ?>
					<td class="center hidden-phone">
						<?php echo (int) $item->id; ?>
					</td>   	<?php endif; ?>

     <td><?php echo $this->escape($item->breedname); ?></td>

	<td><?php
		if (!empty($item->pic)) :
			$picArr = explode(',', $item->pic);
			foreach ($picArr as $fileSingle) :
			if (!is_array($fileSingle)) :
				$uploadPath = 'components/com_breed/breedpic' .DIRECTORY_SEPARATOR . $fileSingle;
				echo '<a href="' . JRoute::_(JUri::root() . $uploadPath, false) . '" target=_blank><img src="' . JRoute::_(JUri::root() . $uploadPath, false) . '" width="100px" title="See the pic"> </a>  ';
				endif;
			endforeach;
			else:
				echo $item->pic;
			endif; ?>	</td>

<td>     	<?php echo $item->breedcat; ?>      </td>
       </tr>
	<?php endforeach; ?>

		</tbody>
		</table>
The default.php file is the actual file, holding the HTML-related stuff. All the logic-related stuff is in model, and all the display code is in default.php. In this way, we have avoided mixing PHP and HTML, which is the actual beauty of MVC.
On line 4 of the above-mentioned default.php file code, we use defined(‘_JEXEC’) or die, and as I previously stated, this will prevent anyone from directly accessing this file.Next on line 7, the heading of the page is given in h1 tags. According to an SEO point of view, it is always a good idea to use h1 tags for the page’s main heading. We are declaring the page title in a language string, which will then be processed through the component’s associated language ini file to give the actual text.
We’re displaying the list of records we got from model in a tabular format, and we’re doing so with table and the classes “table” and “table striped.”Giving the proper class names is necessary as these are predefined in professional Joomla templates for giving special styling to the table. After that, the table header, the ad tag, comes, which contains our column headings. The first column refers to record ID with an if statement because, in some places, record ID is not meant to be shown to the public because of privacy or security issues. Then comes the breed name column, the breed picture, and the breed category. That’s what we need for now, but in the next two steps, we will be playing with these in more detail.
Now coming to the table body, “tbody,” This is where the actual processing takes place.The table body rows are going through a PHP foreach loop to display the records. It is using the same property, $items, that we have declared in the view.html.php file to render the items list. The rest is self-explanatory, as we get the id value in the first column, the breed name in the second column, and the breed image in the third column.Next there is the breed category value column, and then there is the end of the foreach loop.
/languages/site/en-GB/en-GB.com_breed.ini
COM_BREED="Breed"

COM_BREED_TITLE_BREEDS="Breeds List"

COM_BREED_BREEDS_ID="ID"

COM_BREED_BREEDS_BREEDNAME="Breed Name"

COM_BREED_BREEDS_PIC="Pic"

COM_BREED_BREEDS_BREEDCAT="Breed Category"
As we have added some language strings in our main view default.php file, so we are calling them here to write their appropriate values in the respective language en-GB.com_breed.ini config file that would replace them in the code.
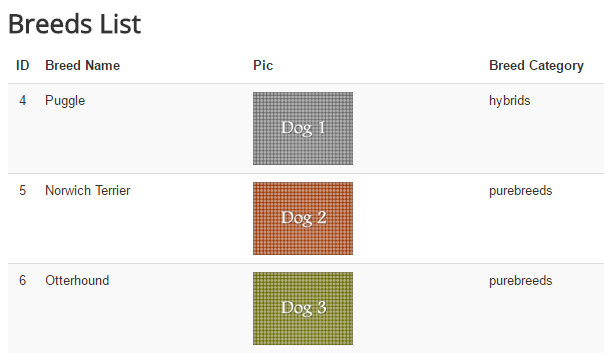
Previewing the component frontend:
Now if you are on the localhost and to view the component frontend, please follow the following url, http://localhost/{joomla directory}/index.php?option=com_breed . When you will open that url, you should see a dogs listing screen like this, shown below.